- Buy a cheap (~$7.00) shutter release cord to sacrifice to the project.
- Carefully cut and strip the wires from release cord. Shorting the green and blue wires causes the camera to focus. Shorting the green, blue and red wires after focusing causes the camera to shoot.
Remember that my soldering days are long ago (hey, was only an EE minor) and have one of the kids at our FIRST Robotics do it for me. Here is the result. Note that blue->white. The blue wires I have all seem to be a bit flakey.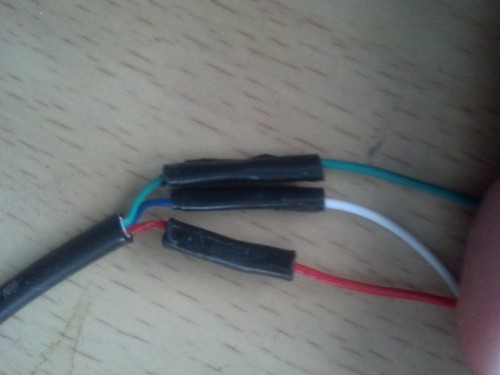
Find someone who has done something similar: http://ujwal.shrestha.me/arduino-intervalometer-for-sony-dslr/ and leverage their code. I'm not sure that is the right solution, but it worked for me. Something with MOSFETs I think, but that was years ago...
Then connected the wires from the shutter release cord to pins as follows:
Green -> Ground
Red -> Digital pin 8
Blue/White -> Digital pin 9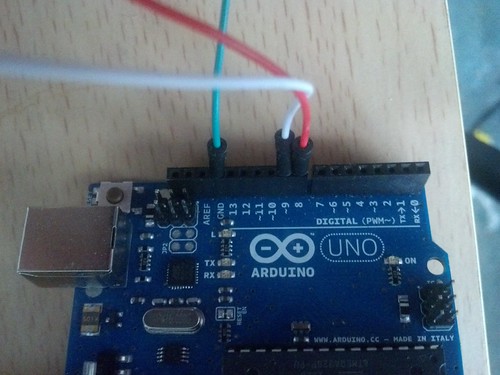
- Now the code. I named it aifs30.ino:
/*

Heavily based on:

http://ujwal.shrestha.me/arduino-intervalometer-for-sony-dslr/

For complete writeup, see http://nozell.com/blog/

The shutter release has 3 wires: green, red, blue which I had soldered
to green, red and white (my blue wires are flakey)

green - ground
red - digital 8
blue/white - digital 9

green + blue/white => focus
green + blue/white + red => take photo

*/

void setup(void)
{
  Serial.begin(115200);
}

void loop() {

  if (Serial.available() )
    Serial.println("VVVVVVVVVV");

  pinMode(8,OUTPUT);
  delay(100);
  pinMode(9,OUTPUT);

  if (Serial.available() )
    Serial.println("Sleep for 1/2 seconds");

  delay(500);

  if (Serial.available() )
    Serial.println("wake up and take photo ");

  pinMode(8,INPUT);

  delay(100);

  pinMode(9,INPUT);

  if (Serial.available() )
    Serial.println("ZZZZZZZZ Sleep for 30s");

  delay(10000);
  delay(10000);
  delay(10000);

  if (Serial.available() )
    Serial.println("^^^^^^^^^^");
}
- If you connect the release to the camera while the camera is on, even if here is no power to the arduino, it will take a couple photos. That is the kink. Just connect it up with the camera off and it will be fine.
- Consider setting the photo size to 'standard' -- it saves a lot on disk space.
- Now find something interesting to point your camera at and come back later. In my case it was our backyard chickens.
- Download all the photos to a directory and use this linux command to convert the JPG images to an AVI file.
mencoder -nosound -ovc lavc -lavcopts vcodec=mjpeg -o timelapse-10fps.avi -mf type=jpeg:fps=10 mf://*.JPG - upload to youtube and enjoy the results
Friday, December 28, 2012
time lapse photography using an arduino to drive a Sony Alpha-100 DSLR
Finally I got around to working out most of the kinks of having the an arduino control the shutter release of a Sony Alpha-100 DSLR camera.